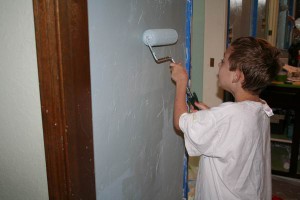
This is the bathroom project that I thought would never end.
If you’re wondering why I’m writing about this when this web site is sort of supposed to be about homeschooling it’s because homeschooling is tied in so intricately with the rest of life. That’s one of the things that makes it so challenging.
You have to figure out how to do school, not in nice, neat spreadsheets in a book that lays out your scope and sequence. You have to figure out how school fits into your home, finances, menu plans, discipline, character training, and life.
One thing I’ve found helpful in making school work better at our house is to get every single project I can think of and possibly do, done in the summer. The less I have to do during the school year, the better. Any home improvement project, organizing, planning, dreaming, etc. ideally would take place during the summer.
It doesn’t always work out that way. Sometimes trips interrupt our normal routine, last year I had to edit a book for months on end, and babies seem to just come with no consideration to my schedule, but my point is: the more we can get done in the summer the more smoothly our school year seems to go.
So, I have a very long list this summer. I remember God is ultimately in control of what gets done and what doesn’t, but as much as possible, I’m trying to get some things crossed off my list. Hence, this bathroom “remodel” (basically painting and new hardware) that has been waiting in line for ten years.
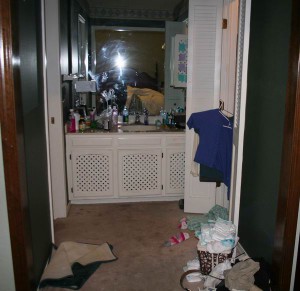
The Really Awful Before Picture
You’d think I staged it to make it look as awful as possible, to contrast with the AFTER picture, but no, it actually looked like this, socks on the floor, counter covered with junk and all.
Yep. It was bad. Really bad.
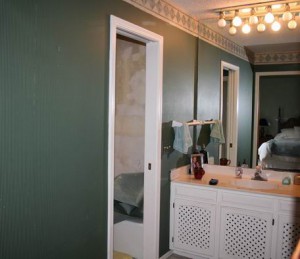
This next picture was taken after the counter was cleaned up (Organizing Extravaganza), but with the lovely green wallpaper still there:
BEFORE
AFTER
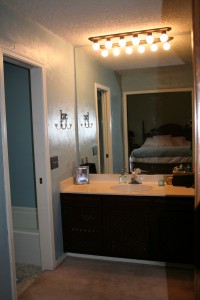
I textured the walls, painted them blue and painted the ugly white lattice brown. I didn’t want to mess with new cabinets so this solves the problem and makes them sort of disappear. I was very pleased with how it turned out.
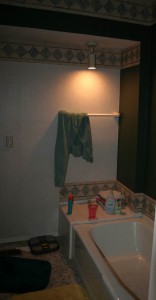
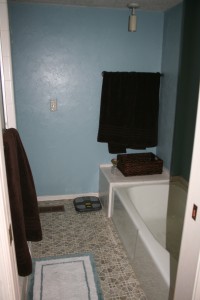
Here are the before and afters for the inner part of the bathroom, the part with the tub, shower and toilet.
BEFORE AFTER
Granted, before looked like a tornado had just gone through,
but that’s what it usually looked like. It was amazing how much difference the
paint on the walls and cabinets made.
Walls – about $150 in supplies (paint, etc.); 4 full days of work
- Removed wallpaper (came down great- took maybe an hour for all of it)
- Realized I needed to texture walls, typed “texture walls” into youtube. Learned methods of texturing walls. (I did not want to use some messy machine or hire a man to do this. I wanted to get it done.)
- Taped off baseboards, put down dropcloths
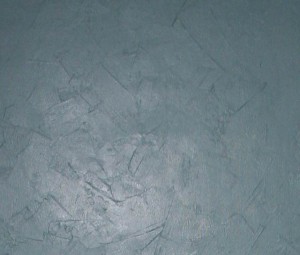
- Used 3 ½ gallons of “mud” (joint compound) to create a plaster look on walls. Basically you spread it on with a: trowel? ?putty knife? (one of those blue thingies you put mud on with), then you spread it around like you’re frosting a cake with CoolWhip until it looks pretty. Let dry.
- Primed. Let dry.
- Painted. Let dry. (This is Benjamin Moore Buxton Blue.)
- Touched up.
If you need to texture a wall, I’d highly recommend the plaster treatment. It took about a day, but it’s super cheap and I love how it turned out. Hides imperfections really well. I noticed at Jason’s Deli that’s how they’ve done their walls, to give it an old-world feel. Here’s a close up:
Cabinets = $50 total, 5 Days of work (a few hours each day)
I loved how they turned out EXCEPT the oil based glaze took forever to dry and still is sticky to the touch. The man at the paint store told me how to do this treatment where you paint it an orangey brown first, then that dries, then you paint a brown glaze on top of it, it’s just a stain, like you’d normally use on wood. I used mahogany and love how it looks, but each coat took over 3 days to dry! If I were doing it again, I’d probably spray paint them brown and call it a day.
- Took cabinets off their hinges
- Painted frames in the room
- Painted cabinet doors in garage/outside.
Hardware & Accessories– Total cost about $180? (mostly towels) My husband hung new towel racks; I switched out the light switch plates. New towels, soap holder, and 2 baskets.
Overall, we love how it turned out. It brings out room into this millennium, ties the bathroom in with the bedroom better so that we actually aren’t going to paint the bedroom after all, and just gives a very clean look.
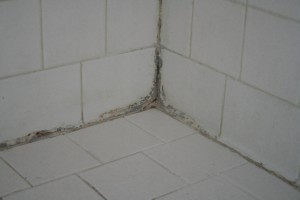
OH! And I have to show you what else I learned! How to remove grout and caulk! Our shower grout was nasty. I paid Stanley Steemer $100 to steam clean the tiles and it hardly helped at all. The man said the grout was shot, due to mildew.
Now, I’m going to show you a picture of this removing grout thing so that you can see how easy and cheap it is, if you, like us, have a 30-year-old house, and nasty grout.
I have never seen repulsive grout highlighted on another blog.
There is probably a reason for this.
But I want you to see how much better it looks. You’re not going to judge me, right?
I have a lot of other good qualities. Grout maintenance is just not one of them.
Okay, are you ready? No judging, right?
I know, I KNOW!
But, here’s the point. You can change this.
You type in “removing bathroom caulk” into youtube and these
nice men show you what to do.
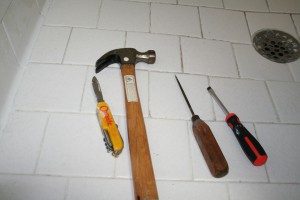
You just get some various tools. I used these:
(I just looked around for sharp things.)
Then you chip away at it while you listen to Dave Ramsey for three hours, and finally the old grout and caulk are gone. I just did the corners because they were the
nastiest and I was a bit done with this whole bathroom project idea by then
anyway.
If mine had been a normal shower, this would have been caulk
and no big deal to remove. It was grout, however, so it involved serious
chipping away. I asked my husband to go to Lowe’s and see if they had something that would soften the grout.
They did not. They sold him some machine, but I don’t do machines. What if I cut off my
thumb by accident? No thanks. We returned it.
I used my handy-dandy sharp tools and they worked fine. By the time Dave
Ramsey was over, I was ready to caulk.
Then, you just get a caulk-gun, which is super fun, and you
put the caulk in the crevice to seal. Again, watch those people on youtube.
They show it all to you.
So, one (long, tedious) afternoon, NO money (we already had
the caulk), and the shower looks like a beautiful spa! It makes me happy to go in
there now.
Oh, and the shower door, there was soap scum on it, so I
used vinegar and a sandpaper scrubber and it came off. See how pretty those
doors are? I don’t have a before picture, so they might not look that great,
but they looked basically like they were encrusted with barnacles. Now, they
look all shiny and new.
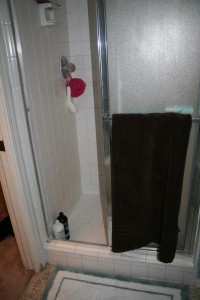 See, doesn’t that bottom corner look much better?
Anyway, I’m showing you all this to say—it was hard work,
but actually, not all that bad in the scheme of things, and it’s so nice to
finally have a bathroom and bedroom that feel clean and like ours!
Only ten years after we got married.
No time like the present!
I’m also so thankful to have energy to do ridiculous and exhausting projects again. I praise God daily for energy, because after years of having none, just the fact that I can do this type of thing and not get sick is so wonderful. I’m very thankful.
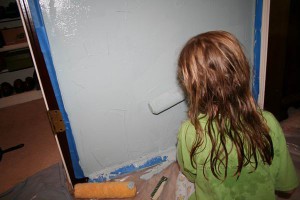
Here are my kids getting a kick out of helping
The toddler was NOT invited to help! I was stressed out enough
with the older two and they only helped about 10 minutes each.
Happy Summer Projects at your house!

